This part of my project explores the relationship between horror imagery, psychological transformation, and digital distortion, using the unsettling face as a starting point. This directly connects to my overarching theme of Metamorphosis, as it shows how the perception of a face especially a distorted one can shift over time and take on new meanings.
“Woman’s Wail” (1986)
I recently watched a YouTube video from a content creator I follow, Joe Bartolozzi. During his stream VOD, he reacted to a video titled “One Picture That Haunted Me for Years.” In this video, the narrator describes how, during his late childhood or early teen years, hyperlinks became a popular way to send scary images through email, tricking friends into opening them without initially seeing what lay behind the link. While most of these images were unsettling but not truly terrifying, he and a friend set out to find a picture that was genuinely disturbing.
Eventually, he came across an image that was so unnerving it embedded itself into his mind. At first, he avoided looking at it again, but with each passing day, his imagination twisted and distorted the memory of the picture into something far worse than what he had originally seen. It haunted him for years, resurfacing constantly in his thoughts.
After three years of living with this lingering fear, he decided to track down the image once more. He enlisted the same friend who had originally found it with him, describing every detail he could recall. Weeks of trial and error later, they finally rediscovered it. The image was from a 1986 Korean horror film called Woman’s Wail.
Seeing this image and others from similar old Asian horror films, made me realise how well these kinds of visuals align with the theme of metamorphosis. The way the mind warps and reshapes fear over time, morphing a single static image into something more terrifying through imagination alone, feels like a psychological form of transformation. It’s fascinating how horror, especially in older Asian films, often plays with perception, the unseen, and the way fear evolves within the mind. I think these eerie, unsettling visuals could be an interesting direction to explore further.
This is the original video from the reaction I watched by Joe Bartolozzi.
Published by Spikima Movies.

This is the face that the narrator saw.
The lighting in this image is coming from a strong low-angle light source positioned beneath the face. This upward illumination exaggerates the shadows, distorting the facial features by casting deep hollows under the eyes, nose, and lips. The contrast between the dimly lit areas and the shadows enhances the scary expression.
Other Faces & Lore


“PINHEAD”
Nico’s Nextbots is a horror-survival game on Roblox, inspired by the Nextbot AI from Garry’s Mod. Released in July 2022, it takes place in a dark shopping mall where players must run and survive against floating 2D images known as Nextbots. These Nextbots, based on meme faces and creepy internet images, relentlessly chase players, making the game both chaotic and intense.
One of the most unsettling Nextbots is Pinhead, a low-resolution, distorted face with a stretched grin. Its exact origins are unclear, but similar images have been used in horror memes and SCP-related content. While not an official SCP, fan-made stories and SCP containment breach mods feature similar eerie faces, often tied to liminal space horror.
“Gatesface.PNG”
The name “gatesface.png” likely comes from Bill Gates, with the image being a heavily distorted or pixelated version of his face. While its exact origins are unclear, it follows the trend of deep-fried meme aesthetics, where images are compressed, warped, and made to look unsettling. The pixelated face and eerie grin create an unnerving, unnatural appearance, almost like a glitched or corrupted file.
While there’s no solid backstory, gatesface.png is widely used in internet horror and meme culture for its disturbing, surreal nature. Its low-quality, warped appearance taps into the discomfort of seeing something recognisable, yet twisted and unfamiliar.
“Dollthing”
The “dollthing” image is another unsettling, distorted face that has gained traction in internet horror culture. It features a creepy, doll-like face, often with exaggerated features or eerie expressions, giving it a disturbing, almost lifeless look. The exact origin of the image is unclear, but it has become part of the deep-fried meme aesthetic, where normal images are warped and pixelated to evoke discomfort and unease.
It’s often used in creepypasta stories, glitch horror, and digital hauntings, where distorted faces appear in old photographs, glitches, or forgotten corners of the internet. Dollthing plays on the fear of inanimate objects becoming alive or hidden, corrupted digital entities. folklore.
This Is the video I used for my research on these Images.
Published by Lazy Masquerade.
Exploring TV Distortion
A significant portion of my research focuses on screen-based horror, drawing inspiration from video games, films, and internet culture. Many of the images I’ve explored such as Nextbot horror faces and distorted film stills gain look through digital manipulation, compression, and pixelation. This reliance on low-resolution imagery and glitches makes television static and distorted broadcasts creates a good direction to explore. The horror genre has frequently used the TV screens, from cursed VHS tapes (The Ring) to transmissions (Poltergeist), reinforcing the idea that the screen itself can be a medium of transformation and fear.
Visually, bad reception, scan lines, and digital noise introduce a sense of distortion, aligning with my project’s theme of metamorphosis. By experimenting with ways to recreate this aesthetic such as photographing distorted TV screens, incorporating digital pixelation techniques, or manipulating images to mimic signal loss I can push the idea of facial transformation further. This could allow me to create unsettling images where identities seem to glitch or shift, much like the warped faces in my research. Using the TV screen as a conceptual and visual tool could give my work a distinctive, recognisable aesthetic while reinforcing the theme of how perception and identity can be altered through media.
The bad reception and TV static aesthetic creates a sense of distortion and unease. Flickering black-and white noise, scan lines, and glitches obscure faces and objects, making them corrupted. In horror movies, this effect symbolises disconnection, making it a good tool for exploring shifting identities and warped perception in my project.
Harry Gruyaert’s TV Shots
“It made me see the world in a different way and to question the ever-growing influence of television throughout the world”
– Harry Gruyaert


Harry Gruyaert’s TV Shots series captures distorted images from old CRT televisions, turning everyday broadcasts into colourful compositions. He uses the imperfections of analog screens like scan lines, colour bleeding, and distortion to create abstract visuals. His work makes ordinary moments feel strange and disconnected, blurring the line between reality and transmission.
To recreate this look, I could photograph an old CRT TV displaying paused or glitched footage, playing with contrast, colour, and signal interference. If I don’t have access to a CRT, I could edit digital images to mimic scan lines, colour shifts, and pixel bleed. Another approach is to project images onto textured surfaces and reshoot them through a camera to create distortion. These techniques would help me explore identity and perception through screen based glitches, much like Gruyaert’s work.
Thomas Ruff – Jpegs
Thomas Ruff’s Jpeg series explores how digital compression transforms images, turning them into pixelated compositions. He takes both his own photos and found images from the internet, enlarging them to exaggerate pixelation until the images break down into blocks of colour and geometric patterns. Ruff challenges the idea that pixelation is a flaw, instead presenting it as something visually striking.
To apply this approach, I could experiment with low-resolution images, enlarging them until the details turn into abstract shapes. Using heavy compression, pixel-sorting techniques, or resaving images at lower quality could help mimic the aesthetic. This could tie into my project by showing how digital distortion alters perception and identity, much like how a face or a memory can shift when seen through layers of interference.
MultiFace
This chapter of my project expands on the metamorphosis theme by exploring how identity can be merged, altered, and reconstructed through facial blending techniques. Instead of using physical masks, I am experimenting with digital manipulation, layering, and face merging to blur between two individuals. This approach challenges the idea of a fixed identity, questioning how much of our appearance defines who we are.
Looking At Copy Shop
Copy Shop (2001) is a short film by Virgil Widrich, blending stop-motion, live-action, and photocopied imagery. The film tells the story of a man who works in a copy shop and, after accidentally photocopying himself, finds that copies of himself start taking over his world.
Key Aspects of the Film:
- Visual Style: The entire film is composed of nearly 18,000 photocopied frames from live-action footage, creating a unique aesthetic that reinforces its themes.
- Narrative: A man named Alfred Kager starts his day normally but soon becomes overwhelmed as copies of himself multiply, consuming his reality.
- Themes: The film explores ideas of identity, repetition, mass production, and loss of individuality in a world that increasingly feels like a copy of itself.
- Sound & Atmosphere: The lack of dialogue and the use of mechanical sounds create a dreamlike, almost nightmarish experience.
Watching Copy Shop gave me the idea to ‘copy’ a face using a scanner as a way to visually explore identity and repetition. The film’s use of duplication and distorted photocopy aesthetics made me think about how scanning a face could create eerie, stretched, or glitched effects almost like a digital mask. This process links to my theme of metamorphosis by showing how identity can be fragmented, multiplied, or altered through simple reproduction, just like in the film.
Scanner Portrait Inspired By CopyShop
The scanner portraits build on my first shoot by pushing the idea of distorted identity and metamorphosis further. Unlike traditional photography, a scanner captures an image in motion, stretching and warping the face as it moves across the glass. This results in unnatural distortions where features appear smudged, elongated, or blurred, as if the subject is trapped behind a digital veil. This technique fits my theme by creating an effect that feels like a mix of masking and transformation, where the subject’s true appearance is altered by the scanning process itself. The images create a sense of disconnection, reinforcing the idea that identity can be shifted and manipulated through technology.
I wanted to use a scanner because it makes the subject look like they’re trapped inside a screen, almost as if their identity is being flattened or processed. It visually represents how people can be distorted, duplicated, or dehumanised through technology and reflects the loss of individuality just like in Copy Shop.

These were the very first images I created when I started this project. I was exploring different ways to distort faces and was introduced to the idea of using a scanner to achieve this effect. My first image captures the subject moving their face across the scanner, creating a sense of warping and distortion. In my other two images, the subjects remained just above the scanner, resulting in a unique visual effect almost as if they were trapped beneath a translucent film, struggling to break free from the image itself.
To degrade the quality of the image, I took a screen grab of the original scan instead of exporting it at full resolution. This reduced the sharpness and introduced slight pixelation and compression artefacts, which made the image feel more digital and broken down. This visual degradation helped reinforce the idea of distortion and identity loss, fitting well with my metamorphosis theme.
The scanner has stretched and warped the face due to movement during the scanning process. The features appear melted and pulled across the frame, especially around the forehead and eyes, which gives a disfigured, almost unreal appearance. The effect makes the face look trapped and distorted, as if it’s being dragged or smeared through the scanner.


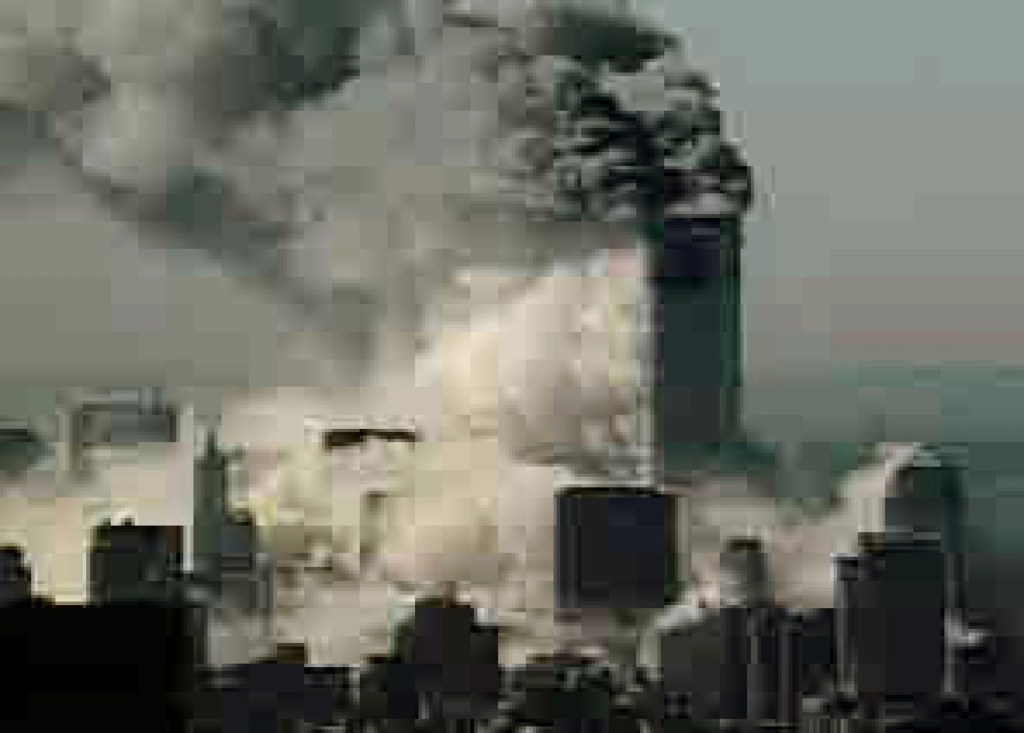
Those 2 images remind me of this picture I saw a few years ago, It is from a film made by ATMOS fx.

These images are very similar to my scanner portraits because they both create the feeling that the subject is pressed up against glass, as if they’re trapped behind a screen or surface. The blurred edges, and foggy textures give a strong sense of distortion. They also have a cold, pale colours with soft lighting and slight desaturation, which adds a ghostly mood.
Adding ‘Screen’ Textures
I want to add textures using Photoshop to replicate the look of a distorted TV or digital screen. These textures like scan lines, RGB colour splitting, glitches, or digital noise will help reinforce the idea that the subject is being viewed or trapped through a screen. It ties in with my metamorphosis theme by showing how identity is being altered or broken down through digital processes, almost like a corrupted video feed. The screen texture adds another layer of visual distortion that makes the viewer question what’s real and what’s artificial.
Looking at Chad Wys’ digital art, it’s clear that he enhances scanned images by introducing glitch effects, chromatic aberrations. These techniques create a strong visual disconnection between the original subject and the final image, making it feel fragmented and digitalised. The textures give his work a retro aesthetic, while also making the figures feel lost or blurred.

Inspired by this, I’ll experiment with layering TV static, glitch patterns, and scan lines over my portraits using blending modes like Overlay, Soft & Hard Light, and Screen. I might also try duplicating parts of the image and shifting them slightly to create that glitching effect. This will push my work further into the space between analogue and digital, identity and distortion.
Textures for Overlay
I chose these two textures specifically because the cracked mirror symbolises fragmentation of identity, while the TV static/glitch texture represents digital interference both linking directly to my theme of metamorphosis and identity distortion. I’m using stock images from Unsplash to find high quality textures that I can blend into my work. By applying these as overlays, I can create layered, unsettling visuals that enhance the horror and conceptual depth of my edits.


I started with a base image of a distorted face, which I duplicated and began layering. I then added an image of cracked glass on top (Layer 0), and set its blending mode to “Multiply” to darken the image and create a fractured effect. I reduced the opacity to around 60% to soften the glass layer and let the original face show through subtly.


I applied a “Subtract” blending mode which inverts and harshens the colours. I added a layer mask to both the face and glitch layers and used a soft brush to carefully reveal or hide parts of each image. This gave me more control over which parts of the distortion were visible.


For this piece, I aimed to combine the glitchy horror aesthetic with a retro TV to create an unsettling, cinematic feel. The idea behind this was to suggest a haunted or corrupted transmission, where a face is caught mid-transformation within the screen.

I began by placing the glitched face image created earlier into a photograph of a TV screen.
To make the face appear like it was truly inside the screen, I used Free Transform > Warp. This allowed me to bend and shape the face to match the curve and perspective of the TV.
I adjusted the handles of the warp tool to match the natural distortion of the screen, giving it a more realistic effect.
I lowered the opacity slightly and applied a soft eraser or mask around the edges of the face layer to blend it smoothly with the glow of the screen.

This final composition combines physical and digital transformation, referencing both horror cinema and glitch culture. It represents a distorted identity caught between the real and the virtual—like a soul trapped in a signal.
Outcomes


Digital Blending
I can use Photoshop masking to blend two faces together, creating a hybrid identity that aligns with my metamorphosis theme. By using layer masks, I can overlay one portrait onto another and gradually erase or reveal specific features. The opacity and brush settings allow for subtle blending, making it possible to merge defining facial structures like the eyes, nose, and mouth while maintaining a natural yet uncanny effect. Additionally, experimenting with clipping masks, feathering, and gradient masking would help in achieving a more organic transformation, where the two people seamlessly morph into one another rather than appearing as a hard-cut collage.
I am looking at work by Craig Gibson’s “Boys and Their Fathers” project, where he blends portraits of fathers and sons to highlight genetic similarities. By merging two faces into one, he creates an uncanny, hybrid identity that feels both familiar and unsettling. This technique relates to my project by showing how faces can be reconstructed to form new, ambiguous identities, much like a mask that hides and reveals at the same time.


Comparisons with John Stezaker
To develop this idea further, I will explore John Stezaker’s collage techniques, where he transforms vintage portraits by cutting and merging images to create eerie, fragmented faces. His work highlights the power of juxtaposition and distortion in reshaping identity. By experimenting with similar methods, I aim to create images that feel like shifting, unstable personas, reinforcing the theme of transformation in my project.


Multiple Face Blend
Setting Up the Camera and Lights
I started by setting up a controlled lighting environment to ensure consistency across all images. I used a softbox light positioned opposite to evenly illuminate my the face, reducing harsh shadows and making it easier to blend the images later in Photoshop. A neutral backdrop helped maintain focus on facial details. I also mounted my camera on a tripod to keep the framing consistent between shots.
Capturing Different Facial Expressions
I directed to make a variety of exaggerated facial expressions, such as raising one eyebrow, widening or squinting the eyes, smirking, frowning, and opening the mouth in different ways. Each expression highlighted specific facial features that I could later combine. I took multiple shots for each expression, checking the focus and lighting between takes as changing the position of the face may make the lighting uneaven.


Photoshop
Importing and Layering Images in Photoshop
After selecting the best images, I imported them into Photoshop and stacked them as separate layers in a single document. I aligned the images manually to ensure the facial features matched up as closely as possible.
Using Layer Masks to Blend Features
To create a new, impossible facial expression, I used layer masks to blend different facial features from each image:
- I added a black mask to each layer, hiding the entire image.
- Using a white brush, I painted over the mask to reveal specific features, such as a mouth from one image, eyes from another, and eyebrows from a third.
- I adjusted the opacity and brush hardness to create smooth transitions, ensuring the blends looked natural.


Refined Studio Shots
One of the biggest changes is in the use of lighting. In the second set of portraits, the lighting is more dramatic and directional, creating a higher contrast between the subject and the background. This gives the images more mood and tension, which fits better with the Metamorphosis theme I’m exploring. The background also feels more textured and immersive, whereas the first set has flatter lighting that feels more neutral.
Another key improvement is the use of costume and expression. The inclusion of the black hood in the second shoot instantly transforms the subject and adds mystery. This is a visual for transformation and concealment, which directly links to my project’s concept.
These improvements were necessary to communicate my concept more clearly and effectively. The first portraits felt too clean and safe, while the newer ones feel more experimental and visually disturbing exactly what I’m aiming for in a project about identity distortion and transformation through fear. Going forward, I want to push this even further using distortion techniques in Photoshop to build on top of it


Lighting Diagram, Camera/Light Settings
For this shoot, I used a studio setup to control the lighting and achieve a dramatic, cinematic effect that fits the horror inspired theme of Metamorphosis. I wanted to create strong shadows and directional light to sculpt the face and cloak, making the subject feel mysterious.
Lighting Setup:
I used a 2 key light positioned at a 45-degree angle to the subject’s face (Rembrandt-style lighting). Also lighting the bakground. This can be seen clearly in the behind-the-scenes shots. The light was raised above the subject and angled downwards to create shadows under the brow and nose, which helped add drama and depth to the facial expressions.
- Light Source: Neewer Vision 4 studio light
- Power Setting: Varied between 1/8 and 1/32 to test how much contrast I wanted in the shadows.
- Modifier: Standard reflector (no softbox), to keep the light harsh and focused, which worked better for the horror look


The background was a brown textured backdrop, which absorbed light well and gave a more cinematic tone than a plain white background. It added warmth which works well with the idea of transformation and distortion.
Camera Settings:
- Mode: Manual
- Shutter Speed: 1/160
- Aperture: f/4.5 – to get a shallow depth of field and keep the subject sharp while the background blurred slightly
- ISO: 100 – to avoid any noise since the lighting was controlled
- Zoom: 50mm to keep consistency


Reflections:
This setup gave me much more control compared to my earlier shoots. The lighting is more precise, the shadows are deeper, and the overall mood fits the horror tone I’m aiming for. The use of the hooded costume combined with the harsh lighting also helps symbolise concealment and transformation — key ideas in my project.
Merging Faces & Creating a Digital Metamorphosis Sequence
I am experimenting with merging different facial features from the same subject to create a series of disturbing hybrid portraits. Each image combines elements like the eyes, mouth, and expressions from different shots to form faces that feel unnatural and subtly wrong. This links directly to my theme of Metamorphosis by visually showing transformation as something unsettling and digital where the subject is caught between different versions of themselves.
I used Photoshop to layer multiple facial expressions, blending them together using layer masks and brushwork. As the features gradually shift from image to image, they build up into a kind of animated sequence.
My goal is to turn these merged portraits into a looping GIF, where the face continually changes, almost glitch-like way. This technique is inspired by digital artists who explore identity distortion, as well as horror films where transformations happen gradually and disturbingly. Capturing that moment of transformation in motion.
Masked images:


Photoshop Animation
Step 1: Converting to Black & White
In Photoshop, I converted each image to black and white using the Black & White adjustment layer. This helped strip away distractions and gave the images a more classic horror aesthetic, similar to old horror films or early photography.
Step 2: Stacking Files for Animation

I then went to File > Scripts > Load Files into Stack to import all my edited JPGs into a single layered file in Photoshop. This allowed me to organise each frame for animation easily.
Step 3: Creating the GIF

Using Window > Timeline, I created a frame animation by turning each layer into a separate frame. I adjusted the frame delay to 0.2 seconds, which gave the animation a jittery feeling that matches the horror theme. The loop was set to Forever so the transformation keeps repeating.
The final outcome is a GIF that continuously shifts between different facial distortions. It brings my theme of metamorphosis to life in a digital way.
Outcomes


